Showing posts with label diy. Show all posts

Thursday, September 4, 2014

Nursery Update 1... PAINT and Tips

Finally, a nursery update! So y'all have probably noticed that there hasn't been a whole lot of regular home-bloggin' going on around here, but it's mainly because where our home is concerned, the main focus has been on getting the nursery all ready for our baby girl.

Last we spoke about this space, we had removed the bunk bed that was built in (and taking up a lot of space).


Seriously it's deceiving how much space this was taking up. So we removed it and it really opened up the room.

We were left with lots of unevenness in the sheetrock where the bed connected to the walls, some huge anchoring bolts sticking out of the wall that literally broke off as Brad removed pieces of the bed, and lots of paint to touch up.

So Brad sawed off the bolts with a Dremel tool and patched and sanded the walls.  Only thing left to do was choose a paint color.

 We thought about using the existing paint color (I was pretty sure I knew what it was), but the more I looked at it, the more I wasn't too thrilled with how yellow-beige it looked against all the stark white trim, especially since I'd be bringing in some pink tones to the room. I just thought it wouldn't look quite right.  The issue with choosing a color was that it would have to be something that we could continue along the ceiling as well like the old color did. If we had just painted to the ceiling, the existing color on the ceiling would have really looked beige and out of place.  The room has a pitched ceiling in certain places too, so I didn't want to just slap up some white paint on the ceiling and then do a stripe of color just on the walls above the bead board. I felt like it would be pretty choppy-looking.

So I knew we'd have to choose a shade that was a bit light and bright so it wouldn't look too enclosing continued all over the ceiling as well. Because of all the stark white trim in there on the bead board, it made it easier to pull off a lighter and brighter color without looking too plain because all the tones show up against the stark white.
Sounds a bit confusing, but stick with me...

So I chose a shade technically in the "white" color family, but with a lot of pink tones.  The color is Marshmallow by Sherwin Williams.

This was taken when the paint was still a bit wet, so you can see a bit of it drying still on the ceiling.

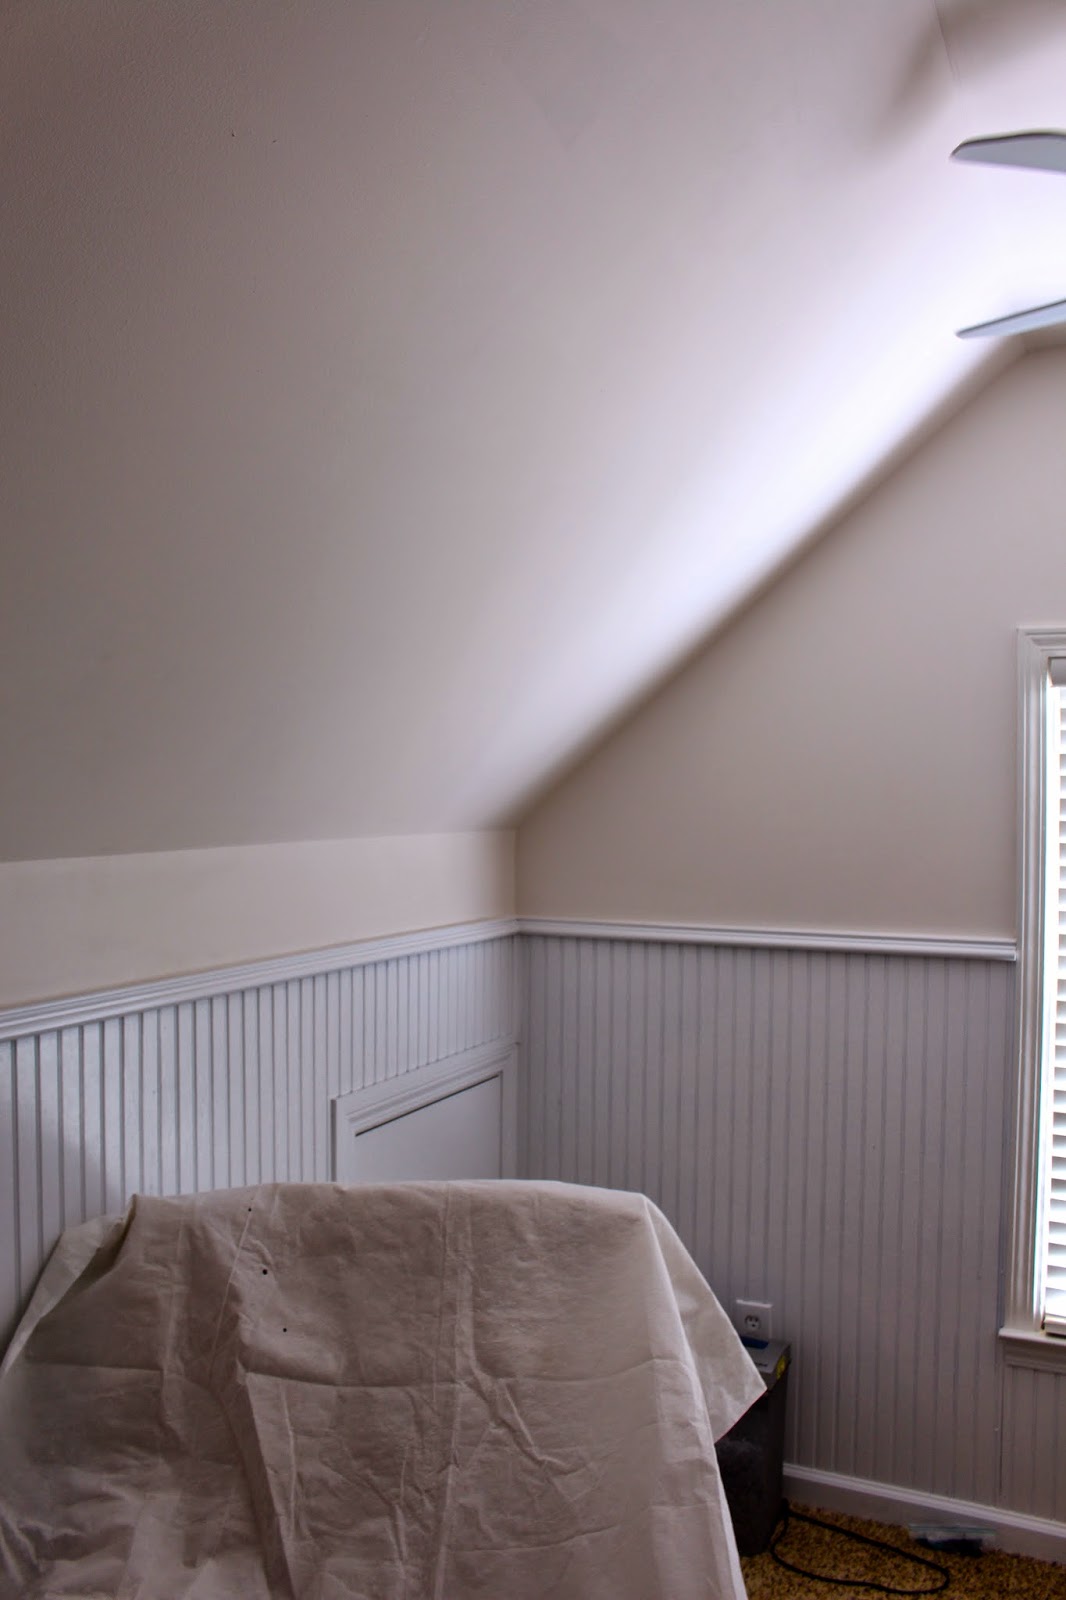


I remembered this shade because I had considered it for our foyer but ultimately ruled it out because it read very pink compared to other whites with different tones. So I knew it would be pretty perfect for our gal's room. We really love how it came out.

This was Brad's first painting adventure solo. He did such an amazing job (and was so happy when it was all done).

Funny because if you painted this shade in a regular room with no stark white trim (like the large area of bead board on the wall) it wouldn't read as pink. I've seen photos of this color used throughout entire homes! It's just crazy how different whites can be.  Anyone that has seen the nursery in person has commented on what a pretty soft pink it is.

While I'm no painting expert (and while Brad did amazing considering it was his first go-round doing a whole room by himself), we do have some tips to share (if you've followed for a while, you know I've painted almost every room in our homes). These were the main ones I passed on to Brad when he began painting the nursery:


  • Don't waste money on plastic paint tray liners! Buy a metal paint tray once, and cover it with heavy duty aluminum foil before pouring paint in. Easy clean-up, and you can re-use the (clean) metal paint tray indefinitely.
  • Skip painter's tape if you have a steady hand and go around all the trim, doorways, corners, ceiling, etc. with an angled brush first, then use a roller to fill-in.  This is just the basic way to paint and it works. Saves time, tape, and your sanity.  If you've ever taped-off an entire room, you know what I mean.
  • When you use the roller, roll suuuuper sloooooow. Seriously ridiculously slow. Even if you don't think you're dripping anything, you'll leave tiny micro-splatters (totally a legit thing) all over the room and yourself.
  • Drop cloths and broken-down cardboard boxes are your friend. You can lay out all your paint supplies on the flattened cardboard box and move it all around the room wherever you need it. And drop cloths... just use them to cover nice things you don't want to remove.


So the moral of this story is that we're really happy with the paint, and to also never overlook colors in the white family for rooms. They can be pretty perfect when you don't want the focus of a room to be the walls, but still want to complement the tones in the decor you're going to add. One in the perfect tone can change the whole feel of the room without being so "in your face".

So as I've mentioned in many of my pregnancy vlogs, the nursery has come a lot farther than this! While it's still kind of a mess (no super pretty after photos in this one, sorry!), there's a lot more progress to share like lighting, window treatments, the crib (!), etc. So I'll definitely keep you updated on our progress in the coming weeks!

As always, thank you all for being so happy for us and so supportive as we share this special time with you all. It's obviously a huge part of our life right now and we couldn't be happier to be experiencing all of it and being able to share it!

Thursday, June 19, 2014

Foyer changes... Adding privacy, texture, and a new (old) rug

Lots of changes have happened in our foyer over the last few months. Well, namely to the front door.
This is how it all looked originally (well, in the midst of having the gold/brown faux-finished walls painted bright white).


I knew I wanted the foyer area to be bright and open and for the walls to be very white, which isn't something I did throughout the rest of the house. I wanted it to be bright and airy. The key to going white without looking blah is to add some contrast. The floors, stair treads, and chandelier were already pretty dark, but shortly after the new paint was completed, I painted the french doors black, which to this day is one of my favorite projects I've done here.  It really helped the foyer look more balanced and pulled together.

But as you can see from the photo above, the wall with the front door was a sea of bright white. White blinds, white door, white trim and walls. It was kind of blah.  So shortly after painting the french doors, I painted the inside of the front door a deep glossy black, which I loved. Problem was, it looked a bit "stark" against all the white, especially the blinds on the sidelights. I had never been a fan of those anyway, so one day I just decided to remove them. It really made the entire door look so much better.

Here's where things got a bit crazy...haha.  I started experimenting a bit and painted the sidelights the same black as the door which I really liked.  Now this was something I didn't really hesitate much with because eventually, we'd like to replace the entire front door- sidelights, transom, and all, with thick, dark, warm-toned wood double doors.  We've seen other homes around us do that and it's gorgeous. But I still like my black door, so for now, we're good. But I didn't feel so bad about playing around with painting it because I know it's not going to be here forever.

Problem was... we had zero privacy at night with the sidelights. We're off the road a bit, but I still get creeped out by bare windows.  So we played around with some little sidelight curtains (which we hated), window film (which was a pain...and which we hated), and left it bare for a long while. After scouring Pinterest, I was inspired to hang some pretty sheer curtains around that area and I love how it turned out!


I skipped painting the transom (window along the top of the door) for now, because I wanted it to still flow with the matching transom above the french doors right next to it. Didn't want one black and one white, ya know? Definitely would have painted the whole thing black if the other white transom wasn't so closeby (and I still might). So I'm just not sure.


Now I will say, some of the inspiration photos of "front door drapery" on Pinterest were... well, not good. Some were awesome. So I was afraid this could go either way. But what I found to be the distinguishing factor between the two is how high you hang the rod. All the photos I saw of rods basically "laying" along the top of the door looked no bueno to me. So I raised it a bit. Also, I didn't really like the look of a typical Target-type cafe curtain rod along the top. Because the door isn't really a window, obviously. So I wanted to make it a bit different.
So I had a custom-sized, clear lucite curtain rod made from Etsy.


Lucite/acrylic rods sag so much in the middle from their own weight, so I added another bracket in the center (you can't really tell, but I got these in a "brushed brass" finish so it's actually not too terrible looking). Love the look of lucite and brass. However, I'm considering painting the area of the bracket that touches the wall and the area that reaches out to the rod the same color as the wall so it's not so "in your face". I like the little part that goes around the rod itself though. Another project for another day...
As for the brackets themselves, I got them for a few dollars on ebay.

The curtains are from Curtainworks. Super affordable. They are the "Soho Voile Pinch-Pleat Curtain Panels". I put two on each side for more fullness.

After I took this photo, I realized the left side covered one of our motion detectors for our security system down here so to avoid any middle of the day or night false alarms from moving curtains, I moved them inward a few inches on that one side. Something to think about if you are considering this near a front door where motion detectors usually live.

You may have also noticed the (huge) curtain hold backs...

I found these on Overstock and kind of love them. At first, they freaked me out because of the size, but I think the size and the dark color really adds more balance and more contrast to the whole wall. Since these curtains are pretty "fixed" at the top and don't slide easily, I thought pushing them back during the day against a hold back would be easier than sliding the curtains back and forth all the time. It's really so much easier and I love the look so much better.

When the sidelight windows were bare for so long, we got used to the windows being totally open during the day which we love (Waylon does too).


Puppy nose prints all over those bottom windows... all. the. time.

So for us, this is a good solution that gives us both the open-ness during the day and the privacy at night. Plus, we found that when they're just hanging without hold backs, they get sucked out of the door when it opens. At night, we just pull them out from behind the hold backs, and they fall in front of the sidelights just right. Plus, I just love the texture they added to the room. It made it feel cozier, but still open due to the sheerness. Loving them.

Oh... and a few more quick changes...


I swapped the big black rug in the foyer with this pretty jute/seagrass-looking one we've had FOREVER.

Seriously this was probably the first "big" rug I ever purchased. I got it years ago at Target when we moved into our first house (ours is the 5x7 version). It lived under our kitchen table and took a beating. It was also right next to the back door at that house (think Waylon running inside with muddy paws all over it constantly).  It always cleaned really well and has gotten better and softer with age.  It lived in our basement for a while after moving here and I even purchased a similar, larger version with a black border to go under our dining room table. It's not as soft as this one, though. This rug is very similar to the Pottery Barn version, and is a fraction of the cost.

Anyway, I switched out the black rug that was here before...


...mainly because of the constant vacuuming with Waylon. Oh, if Golden Retriever hair was a valuable commodity...
Basically he sheds like a monster and there were many embarrassing moments when I would open the door to an unexpected neighbor, friend, etc. and say "Come on in! and don't look at the dog hair-covered rug".  Being greeted with more dog hair than is on the actual dog is never good. This thing just magnified it far more than I thought it would. I try to vacuum the rugs at least once every 3 days and sweep up the hair on the hardwoods with a dust mop every day or every other day. But it still gets totally out of control. Also, something to think about if you're wanting a Golden Retriever...haha. They're totally worth it though.

So that rug is in the basement now. It totally should have been all along because it's perfect down there! I'll do a basement update post soon because SO much has changed down there and the big empty room is no longer empty... ;)

Oh, and we're loving the "new" one in the foyer so much. It looks better overall and puppy's hair blends right in. ;)

Frankie the fig lives where the chair used to be, right in the curve of the stairs.


I've moved this poor guy around more times than I can count at this point, but I figured this would be the best place for lots of sunlight and TONS of room to grow. I mean he'll probably move again next week, so don't hold me to this.

He had really began to block the doorway to my office/living room more than we could stand, so now it's nice to be able to open both doors and have it feel so much more open.


Here's a good before-and-after for ya...


Wait, wait... Let's do a major before....


Oh and I may or may not have started pulling up the carpeting on the stairs! Didn't find great things under there...haha. There are beautiful curved stair treads (that match the edges) beneath it, but the side against the white trim along the left on both parts (even the little landing curve) aren't flush against the wall. The carpeting is covering a HUGE gap. So I'm not sure what we need to do. I may have to call in a pro to trim it out correctly, then I can *hopefully* do the rest myself. We shall see... I'll keep you posted!

Have a great rest of the week!

Wednesday, May 14, 2014

A TON of new updates around the house

These last few weeks have been kind of nuts. Not only with some new things going on around the house (we're finally doing something pretty big with that huge empty room in the basement), but life in general has just been pretty busy. I'll update you all soon on the basement progress!

So I didn't really realize until a few days ago that I had totally skipped last week's decor post! What was I thinking, right?? ;)  Well since there has been no shortage of changes and updates around here, I thought I'd combine several updates into one giant post for you guys to sort of collectively share these past few weeks.
So get comfortable, grab a snack and a beverage, and let's get to it!

Remember when I painted the front living room/my office the same color as the kitchen (Clay Beige by Benjamin Moore)?  Well long story short, the color is the perfect "greige" and we sort of fell in love with it. Ever since I used it for the living room, I contemplated continuing it into the dining room as well.

Well I finally did, and we love it.


I always liked the gold/tan shade in the dining room (that color was throughout most of the house when we bought it), but I feel like this connected space looks best when the color continues on that wall behind the columns. It made it look more continuous and the color itself works perfectly with the decor in there.  I have something else in mind to add to the walls in there, so I'll for sure update with the details on that if I get brave enough to do it!

I wish I had a before shot of that exact angle above. I think I avoided photographing that area where the rooms meet for a reason while they were two different colors.  It just never felt "finished".  So happy with how that turned out!


 I think the new color really works well with all the furniture and accessories in the room...


If you follow these decor posts, you may have noticed something a little different in the living room/office...


I decided to add a pair of matching lamps to the Target end tables that I painted...


These are just the lamps from our family room that I did a little switch-a-roo with.  I think it looks so much better and balanced, but they're also super functional as well, as this room gets very dark at night. This is the only room in the house without an overhead light. I've thought about having it professionally wired for one and adding something fun in the future. I think it may even be wired for one with a box and everything underneath the ceiling sheetrock. Just because there is a dead wall switch right as you come into the room which may be set-up to go to it. Totally not sure. Sounds like something I should probably get checked out though. 
Anyway, it makes a huge difference in lighting the room at night so I'm happy with the change!

I also moved Lil' Fig next to the window so he would get better light. 


Meanwhile....


OH and speaking of figs...


Check out all the new growth on Frankie!!


This is majorly exciting because it took several months to figure out how to care for this guy. Fiddle Leaf Figs are no joke.  I had heard that they sprout new leaves in the Spring, but I wasn't so sure. After a year of having him with no new growth, this was a huge surprise! *For more info on how I care for my figs, check out this post.

When I was looking back at all the updates I could share in this post, I remembered another painting project I never shared!!


I continued the White Truffle (Behr) shade from the foyer throughout the upstairs hallway.

*For more on the white frames, check out this post.

I love how much it opened up the space and I think it will look much better as I continue the white "frame wall" all down the hallway throughout the years.

Here's what it looked like before...


Finally, I found some new patio chairs a few weeks back for our screened-in porch...

*If you're curious about the blue ceiling, check out this post to read more about it!
I love how little space they take up. I had this glass table out there since we moved in with no chairs.  All the ones I had found were too bulky or were crazy expensive for what they were. I found these at Ballard on sale, and I had a 15% off coupon which was awesome.  They're super heavy and much sturdier than they look. 


So happy with them! Having breakfast out there while Waylon runs around the yard is pretty much my favorite.

So that's my crazy huge home update post for ya! I hope you enjoyed checking out what's new around here.  We've got tons more going on around here too so there are definitely lots more updates to come!

I hope you all are having a great week so far!

::SHOP THE POST::


post contains affiliate links

Thursday, May 1, 2014

More Sheers in my Office/Sitting Room

Last week, I showed you all how the new curtain sheers turned out on our big windows in the family room.

check out THIS POST for more info on this space
 We were so impressed with the quality of the sheer panels and the breeziness (totally a word) they added to that room that I really wanted to put them somewhere else.

So long story short, we chose them for the family room moreso for function rather than something pretty I picked out (I wanted to add some texture and make the windows look more "finished", but didn't want to block the light in there or add any heaviness) and lucky for us, we kind of fell in love with how they look.  They gave the room a more luxe and "complete" feel.

So I started thinking about why I hadn't added drapery to my office/sitting room and found it to be a more "functionality" situation as well.

Here's a waaay back shot of that room...


See the transom windows (the little bare windows above the windows)? Well I didn't want to cover them with heavy drapery. I also didn't want to see the backs of the curtains from the outside of the house through them.  The transom windows are SO pretty to me, but I didn't want to block them.  Since they're a part of the entire window themselves, I wouldn't even think of putting the curtain rod below them (I'm a curtains to the ceiling kind of gal anyway) so I had held off for a while.  I knew the windows needed something though, because they seemed a little bare.

So again, the same sheer panels just made sense.


I purchased four, but decided to skip the ones on the inner half of the windows because I didn't want to move out the little table for them to fall behind. I think it looks so much better!

I'm pretty happy with them, however, they are a bit long and puddle at the floor a bit more than I'd like, so I will definitely hem them a bit.
I've also decided to replace all the regular blinds on the front of the house with pretty white plantation shutters. So stay tuned for that... ;) I cannot wait to get those up!


 Waylon loves to nap on the rug in this room...


Not sure I would consider the whole half curtain look for most windows, but I think it works in here, especially since the windows are so tall and thin and close together. Also because the panels themselves are so sheer and look so light and airy anyway, it helps them look a little more balanced.
They're just so easy.
These are the ones I got (in winter white). I think I may have linked to the wrong ones in the previous post about these, but I fixed it!

So what do you all think?? I hope you guys are having a wonderful week!!

Shop this post!


post contains affiliate links

Tuesday, April 15, 2014

Beauty Samples Idea...

Gotta love when a decor post has a little bit of beauty and makeup mixed right in...

While yesterday's closet tour post/video already related to decor, I still didn't want to skip this week's decor post completely so I thought I'd share a simple little idea that I guarantee everyone reading this post can do. Seriously, you've got the stuff to do this, I promise.

Especially if you shop at Sephora, which I know a lot of you all do!

If you're like me and shop there often (or any other beauty store really), you've probably got a shameful hoarding situation stash of various samples somewhere in your house that you're not... sampling.  When I was rearranging my makeup/filming area in my closet last week, I found a big basket of them.  When I looked in, all the colors of the different sample packaging was kind of pretty. Which gave me an idea...


I grabbed one of my big apothecary jars from a kitchen cabinet that contains a hoarding situation all it's own. I also have a shameful stash of apothecary jars of various sizes, but that's a whole other story.

For more on our guest bathroom makeover, check out this post!

So I dumped them in a big jar and placed it atop the counter of our guest bathroom grouped with a yummy-scented candle and possibly the cutest little Hermes travel soap and dish I ever did see.  I grabbed that at a hotel I stayed at in Minneapolis a few years ago. Not from the nightstand or anything... But all of their little free travel toiletries were Hermes!! Inside is the most precious orange-scented soap. Sort of regretting not snagging a few more (or 27) of them while I was there.  Note to self: When you can get free Hermes anything (even travel soap), YOU TAKE IT.


Seriously cute, huh?

Such a fun way to add some color and put to use some of those samples that you may be stashing! Plus, it's fun for your guests to grab a few new things to try while they stay with you.

If you don't have any apothecary jars like this, no worries! You can use any clear container, vase, bowl, anything! Be creative.

Speaking of apothecary jars, this little update made me bust out my big jar of bath bombs from underneath the cabinet in there that I had never found a real place for. So I just placed it in a little basket by the tub.


This is my favorite way to store them because they stay fresh, are easy to see, and most of all, it just looks pretty.

Here are some canister ideas!


So what do you guys think? What do you do with all those little samples??


post contains affiliate links